ShareMonitor is a multiplatform social listening tool available within IZEA Flex that can be used to look for posts over time across our database of over 40 million creator handles. A monitor provides insights about your search criteria including the number of posts discovered and content analysis powered by BrandGraph®.
Creating a ShareMonitor
- To create a ShareMonitor, select Create Monitor.
- You will then be able to set the parameters to customize your monitor.
Monitor Name
The monitor name will be used to differentiate your monitors from one another.
Platforms
Select which social media channels you would like your monitor to return posts from.
Pro tip: If you are running a campaign, it is helpful to choose the platforms where your creators will be posting.
Start Date and End Date
The start date and end date allow you to specify the timeframe when the posts were published on the social platforms you selected.
Please note: Only posts that were published within the selected dates will show in your ShareMonitor results.
Minimum Follower Count
The minimum number of followers for the social handles returned in the search results.
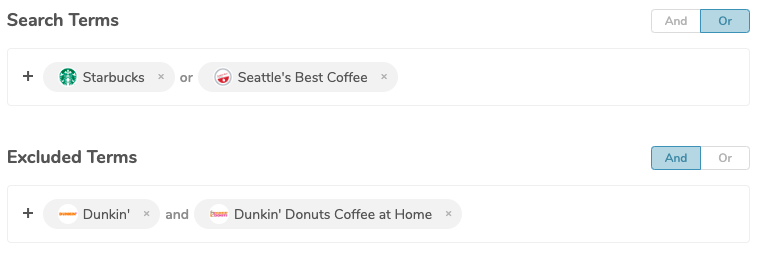
Search Terms
Specify the Brand names, Hashtags, Keywords and/or Mentions to be considered or excluded from the results. Share Monitor will search our database of posts for the search terms provided here. Use the And/Or operators to provide another level of customization for the search.
- To add search terms, enter the keyword in the boxes provided.
- The auto-complete will help you locate a specific brand.
- You can choose to have all of the terms present in the post by selecting AND or choosing OR to have at least one of the terms included in the posts.
- Watch the Post Count in the top right to ensure your search isn’t too specific.
Associations
You can associate your monitor with campaigns, content, contacts, tracking links, etc. These associations help keep your monitors organized and allow you to pull valuable information to be used in your campaigns.
- To associate your ShareMonitor, select Associate.
- A modal will appear where you can start to add your associations. Select the Select Type dropdown menu to select the type of association you would like to add.
- After selecting your association type, click the Search Association box to populate your existing items.
- At this point, you can choose one of your existing items or create a new one.
Once you have finished adding all of your Monitor Parameters, select Create Monitor. You will then be taken to the ShareMonitor overview screen.
Working with your monitor results
Results for your monitor will populate shortly after it has been created. Click into the monitor name to view the results.
Adding Content to ContentMine
ShareMontior results can be saved to ContentMine to showcase organically created content for your brand or client.
- To add a post to ContentMine, select the
icon in the table view or from the menu option in the grid view.
- The system will locate and gather the content from the post provided.
- You should select the Campaign, Content Type and Collaboration type for the piece of content. (This is required with the Campaign Safeguard setting enabled.)
- To add the fetched content, select Save.
Insights
ShareMonitor provides valuable analytics and data for the content that has been gathered. Insights can be found under each ShareMonitor created on the Insights tab.
The information found in ShareMonitor can be helpful when planning for future campaigns or reviewing trends of your current campaigns. Below you will find a few examples of how ShareMonitor results can be used.
- Help to develop influencer lists. You can see who is talking about your brand or product organically.
- Create benchmarks of organic performance. Download a report of the data and see what the average amount of engagement is with posts mentioning your brand.
- View the type of audience that is typically engaging with your content.
- View seasonality from the timeframe that your brand has been mentioned.
- Deep dive into the top performing pieces of content. This will help you to see what was causing that piece of content to perform so well, so that you can replicate it in the future.
The timeframe for the insights provided are based on the timeframe set when creating your ShareMonitor. You can edit this timeframe by selecting the date picker in the right hand corner and choosing a new date range.

Once you have chosen your timeframe, you can view the analytics and data for all the posts within those set dates.
- Post Count - Total number of posts discovered that mention the search terms provided.
- Engagements - Total number of engagements across all monitored posts.
- Engagement Rate - Average engagement rate across all monitored posts.
- Views - Total number of views across all monitored posts.
- Top Connection by Followers - Tops posts ranked by the total number of followers.
- Top Posts by Engagement - Tops posts ranked by the total number of engagements.
- Top Themes - Top themes mentioned across all monitored posts.
- Top Brands - Top brands mentioned across all monitored posts.
- Audience Gender - Audience gender ranking across all monitored posts.
- Flex uses machine learning to predict the demographics for this content.
- Audience Age - Audience age percentages across all monitored posts.
- Flex uses machine learning to predict the audience age for this content.
- Sentiment - Audience sentiment across all monitored posts.
- Flex uses machine learning to predict the audience sentiment breakdown for this content.
Adding Social Handles
If there are additional social handles that you would like to include in your ShareMonitor, you can add them directly in the platform for you to access later. You have the option to add them one by one or in bulk.
Important note: When adding a social handle for monitoring, the social media content will not appear if the creator does not have any posts that match your terms and posting dates.
To add a social handle, from the overview screen, click on the Monitor Name > Add Social Handles.
- From here, select the corresponding social platform for the handles that you would like to add.
Please note: You can only add one platform at a time when adding social handles.
- Copy and paste the social handles into the box provided, separating them by commas.
- You can also create a new contact from the social handles you are adding. If you are adding social handles for a creator in your Contacts, you can associate the social handles to the Contact.
- If you are adding handles from different creators, we suggest skipping this step.
- When you are finished, select Add Social Handle.